PHOTOSHOP
(before photoshop) Taken by Fabiola Mann, 05/02/2014
fig 169
Above is my physics/form tutor, Dr Slaski.
fig 170
I simply used Photoshop to crop this image, ensuring that the main subject's face fell on a point of interest in accordance to the rule of thirds. I then changed it to black and white, darkening all red hues so that all lips and skin tone was more defined.
fig 174
fig 175
fig 176
fig 178
LAYERING 2 IMAGES ONTO ONE USING PSD THEN FLATTENING TO ONE IMAGE AS A JPEG
fig 179
fig 180
COLOUR ADJUSTMENT

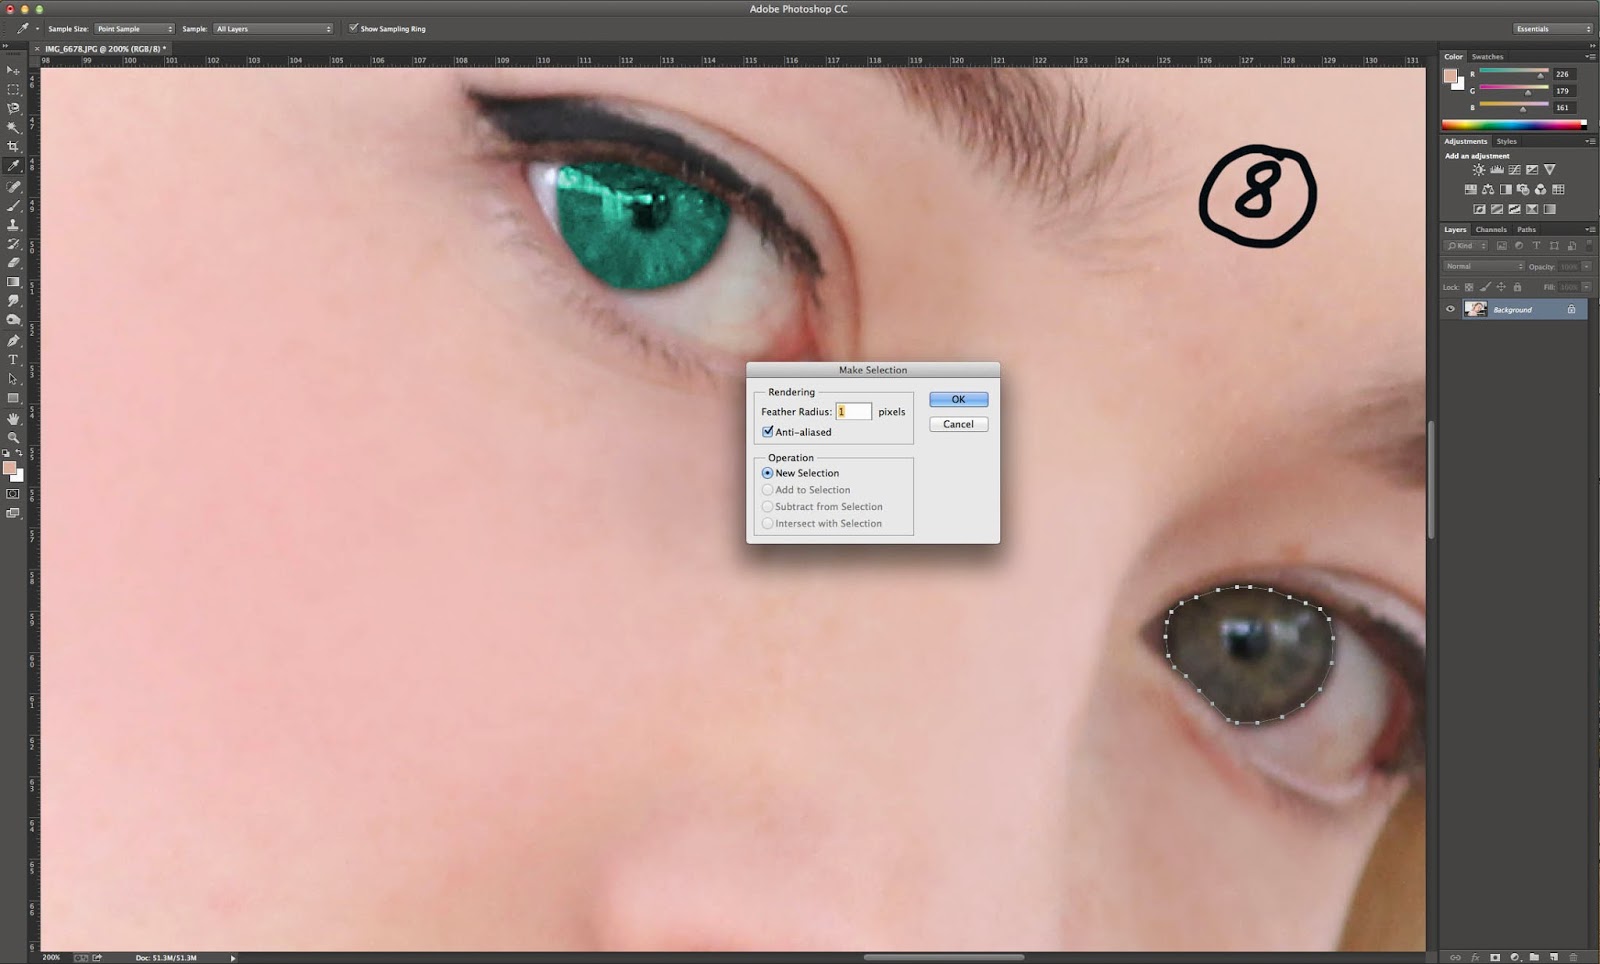
8 steps to colour correction, fairly subtle but they are effective in changing the general mood
fig 181
fig 182
Black and White Bench
fig 183
The Vampire
fig 184
PICTURES OF LAURE TAKEN APRIL 30TH 2014

fig 185
THE ADMIN SHOOT, FEBRUARY 2014 (FROM 300 PICTURES)
fig 186 to 190 are taken from one of the big photoshoots which I did using studio lights. These shots have simply been converted to black and white, with colour restored to specific areas using the Art History brush tool. I am really happy with the final product, but feel that this was more about creativity than technical expertise, selecting which parts to keep in colour and which to keep in black and white.
fig 186

fig 187
fig 188
fig 189
fig 190
fig 169
Above is my physics/form tutor, Dr Slaski.
fig 170
fig 171
fig 172
fig 173
I simply used Photoshop to crop this image, ensuring that the main subject's face fell on a point of interest in accordance to the rule of thirds. I then changed it to black and white, darkening all red hues so that all lips and skin tone was more defined.
fig 174
fig 175
fig 176
fig 177
fig 178
LAYERING 2 IMAGES ONTO ONE USING PSD THEN FLATTENING TO ONE IMAGE AS A JPEG
fig 179
fig 180
COLOUR ADJUSTMENT
 |

8 steps to colour correction, fairly subtle but they are effective in changing the general mood
fig 181
I planned to use the paint tool to give the model smoother skin, and also enhance the colour of her eyes and hair
fig 182
Black and White Bench
The key function in editing this picture was the Art History brush tool. This function is not available on Elements, only CS 6. In this picture, I turned the whole picture to black and white, then restored colour to the model.
fig 183
The Vampire
I wanted to take advantage of the "content aware" tool on photoshop, so decided to use it to remove her reflection in the mirror. I then used the clone stamp tool to clear any traces of her outline.
The content aware tool is used for removing unwanted objects in backgrounds.
fig 184
PICTURES OF LAURE TAKEN APRIL 30TH 2014
In this series of pictures I have used the paint tool to make her hair more vibrant, smoothed the background using a mixture or "Content Aware" and the "clone stamp" tool and converted the image using the "Oil" filter. I then cropped the image using the Golden Spiral overlay available on Photoshop CS6, and flipped the image horizontally.

fig 185
THE ADMIN SHOOT, FEBRUARY 2014 (FROM 300 PICTURES)
fig 186

fig 187
fig 188
fig 189
fig 190
Evaluation
What Went Well:
I have learned:
- How to fully take advantage of Photoshop CS6 and I feel significantly more confident in use of this editing software to subtly enhance pictures e.g. art history brush, hugh/saturation manipulation, colour content awareness, layering images and colour dodge/burn
Improvements
- Some of these tools such as "colour content awareness", which I used in Faith's shots to fix some mistakes in the background, I feel I did not have a chance to fully exploit in other work


No comments:
Post a Comment